

Before you begin configuring your domain in the application, your domain’s DNS settings must point its IP address to 40.160.47.26. This step is a required part of the setup and ownership verification process, as our system automatically performs a DNS lookup to verify domain control before activating your sales landing page.
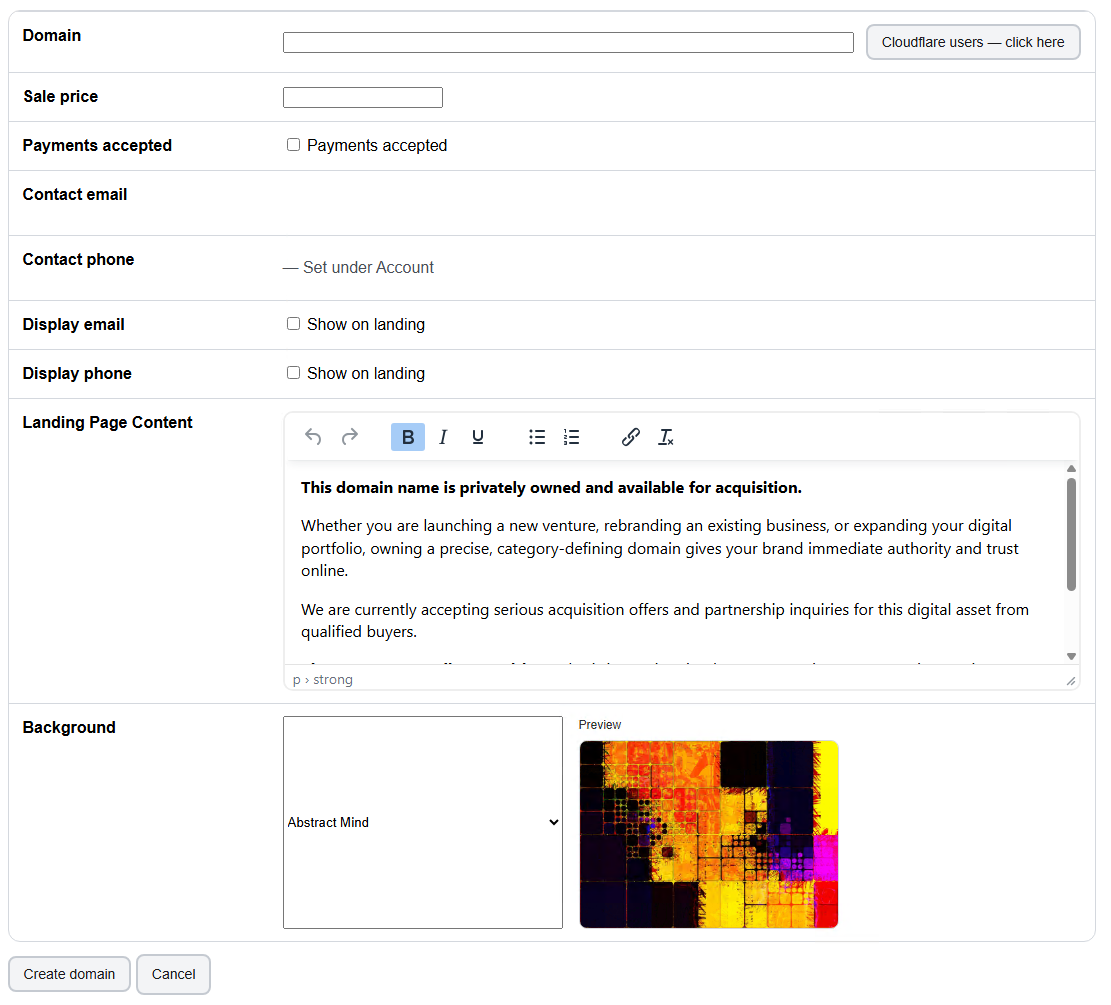
Step-by-Step Configuration Guide
Once your DNS record is pointing to our server IP, follow these steps inside your dashboard to list your domain:
- Navigate to Domains: Open your dashboard and select the option to add a new domain.
- Complete the Form Fields: Fill in your configuration details using the guide below.
- Save and Verify: Submit the form. The system will verify your DNS setup and instantly launch your live sales page.
Form Field Reference
- Domain: Enter your domain name. Note: Cloudflare users must ensure the DNS proxy is turned off (set to DNS only / grey cloud) so our system can detect the IP record.
- Sale Price: Enter the final asking price for the domain.
- Contact Email: Your default email account as configured under your account settings.
- Contact Phone: Your default phone number as configured under your account settings.
- Display Email: Check this box if you want your email address to be publicly visible on your domain sales page.
- Display Phone: Check this box if you want your phone number to be publicly visible on your domain sales page.
- Landing Page Content: Choose whether to use your default sales page content defined in your settings section or write custom text for this specific listing.
- Background: Select one of our available background images to style and customize your landing page appearance.